Verify your account and get $5 free creditTo activate API access, add a payment method to your Bright Data account. This verification grants you $5 in free credit, and you won’t be charged at this stage.
Once completed, your API will be ready to send unlock requests and return clean HTML or JSON responses.
Step-by-step setup
Log in to your Bright Data account using your credentials. If you don’t have an account yet, you’ll be prompted to create one before proceeding.
From the Bright Data Control Panel:1. Open the left-hand navigation menu from the dashboard.
2. Select Web Access APIs from the menu.
3. Click Create API to start creating a new API.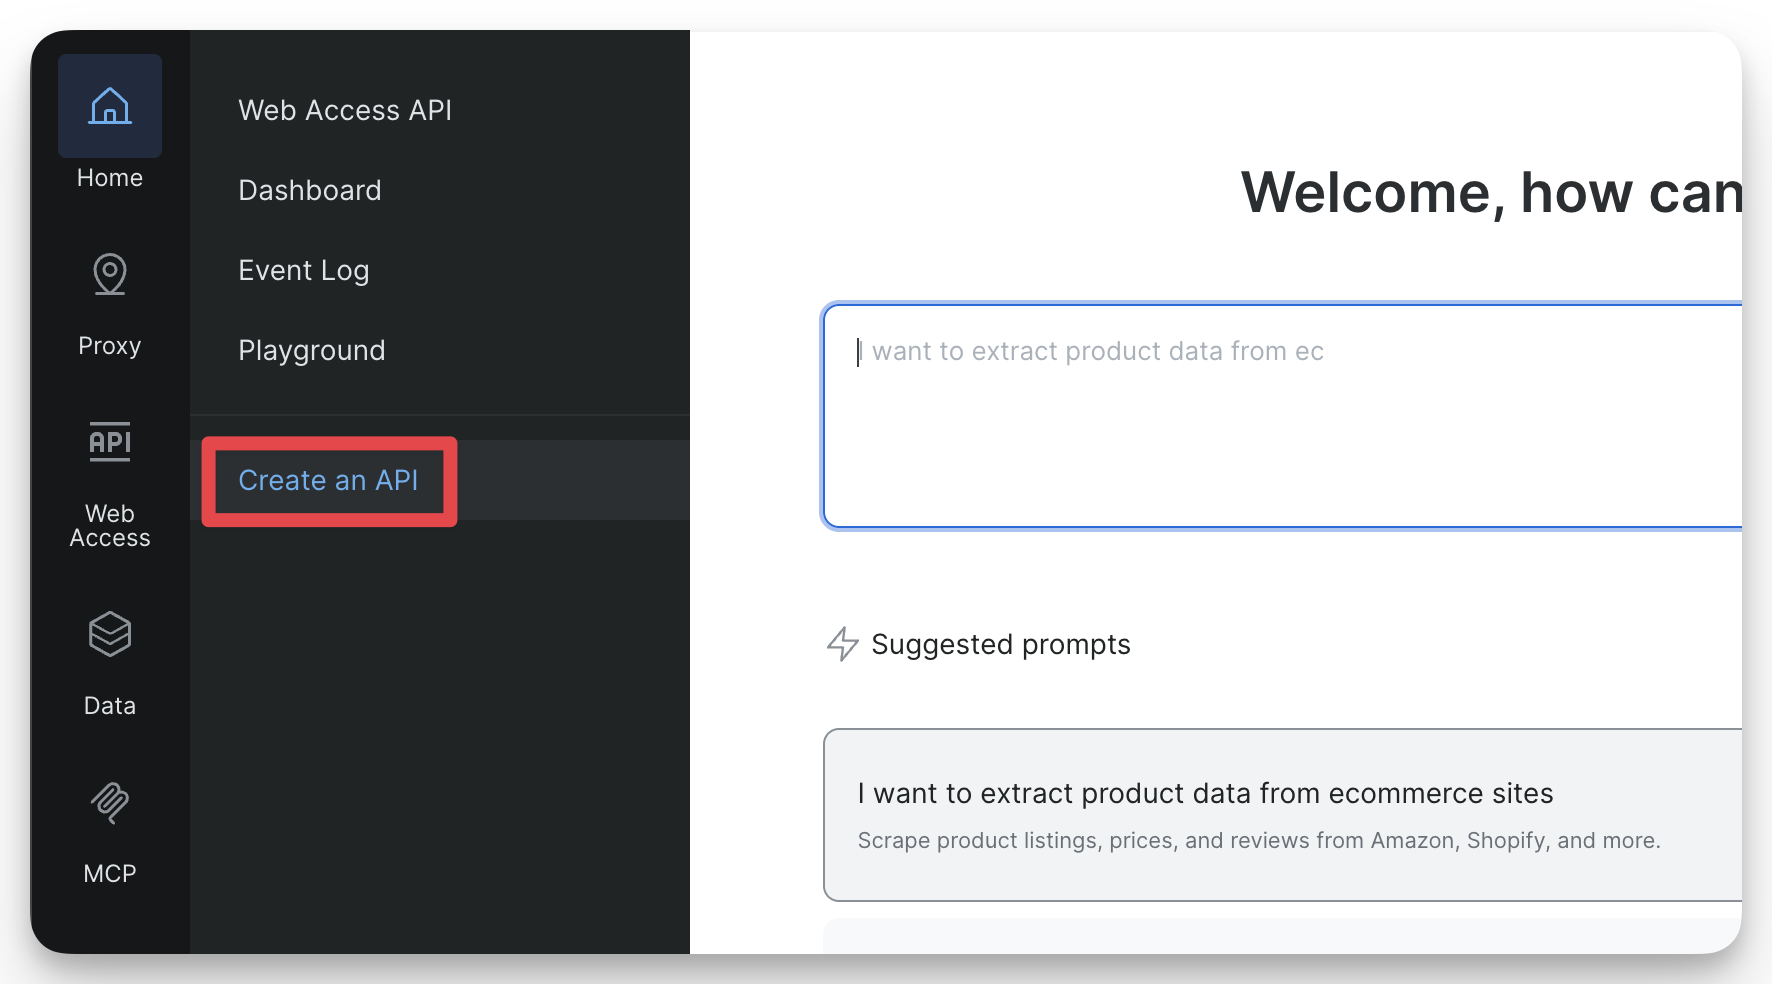
2. Select Web Access APIs from the menu.
3. Click Create API to start creating a new API.
Choose Web Unlocker API
In the API selection screen, choose Web Unlocker API. This enables automatic proxy management and unblocking logic for your requests.Click Continue to proceed.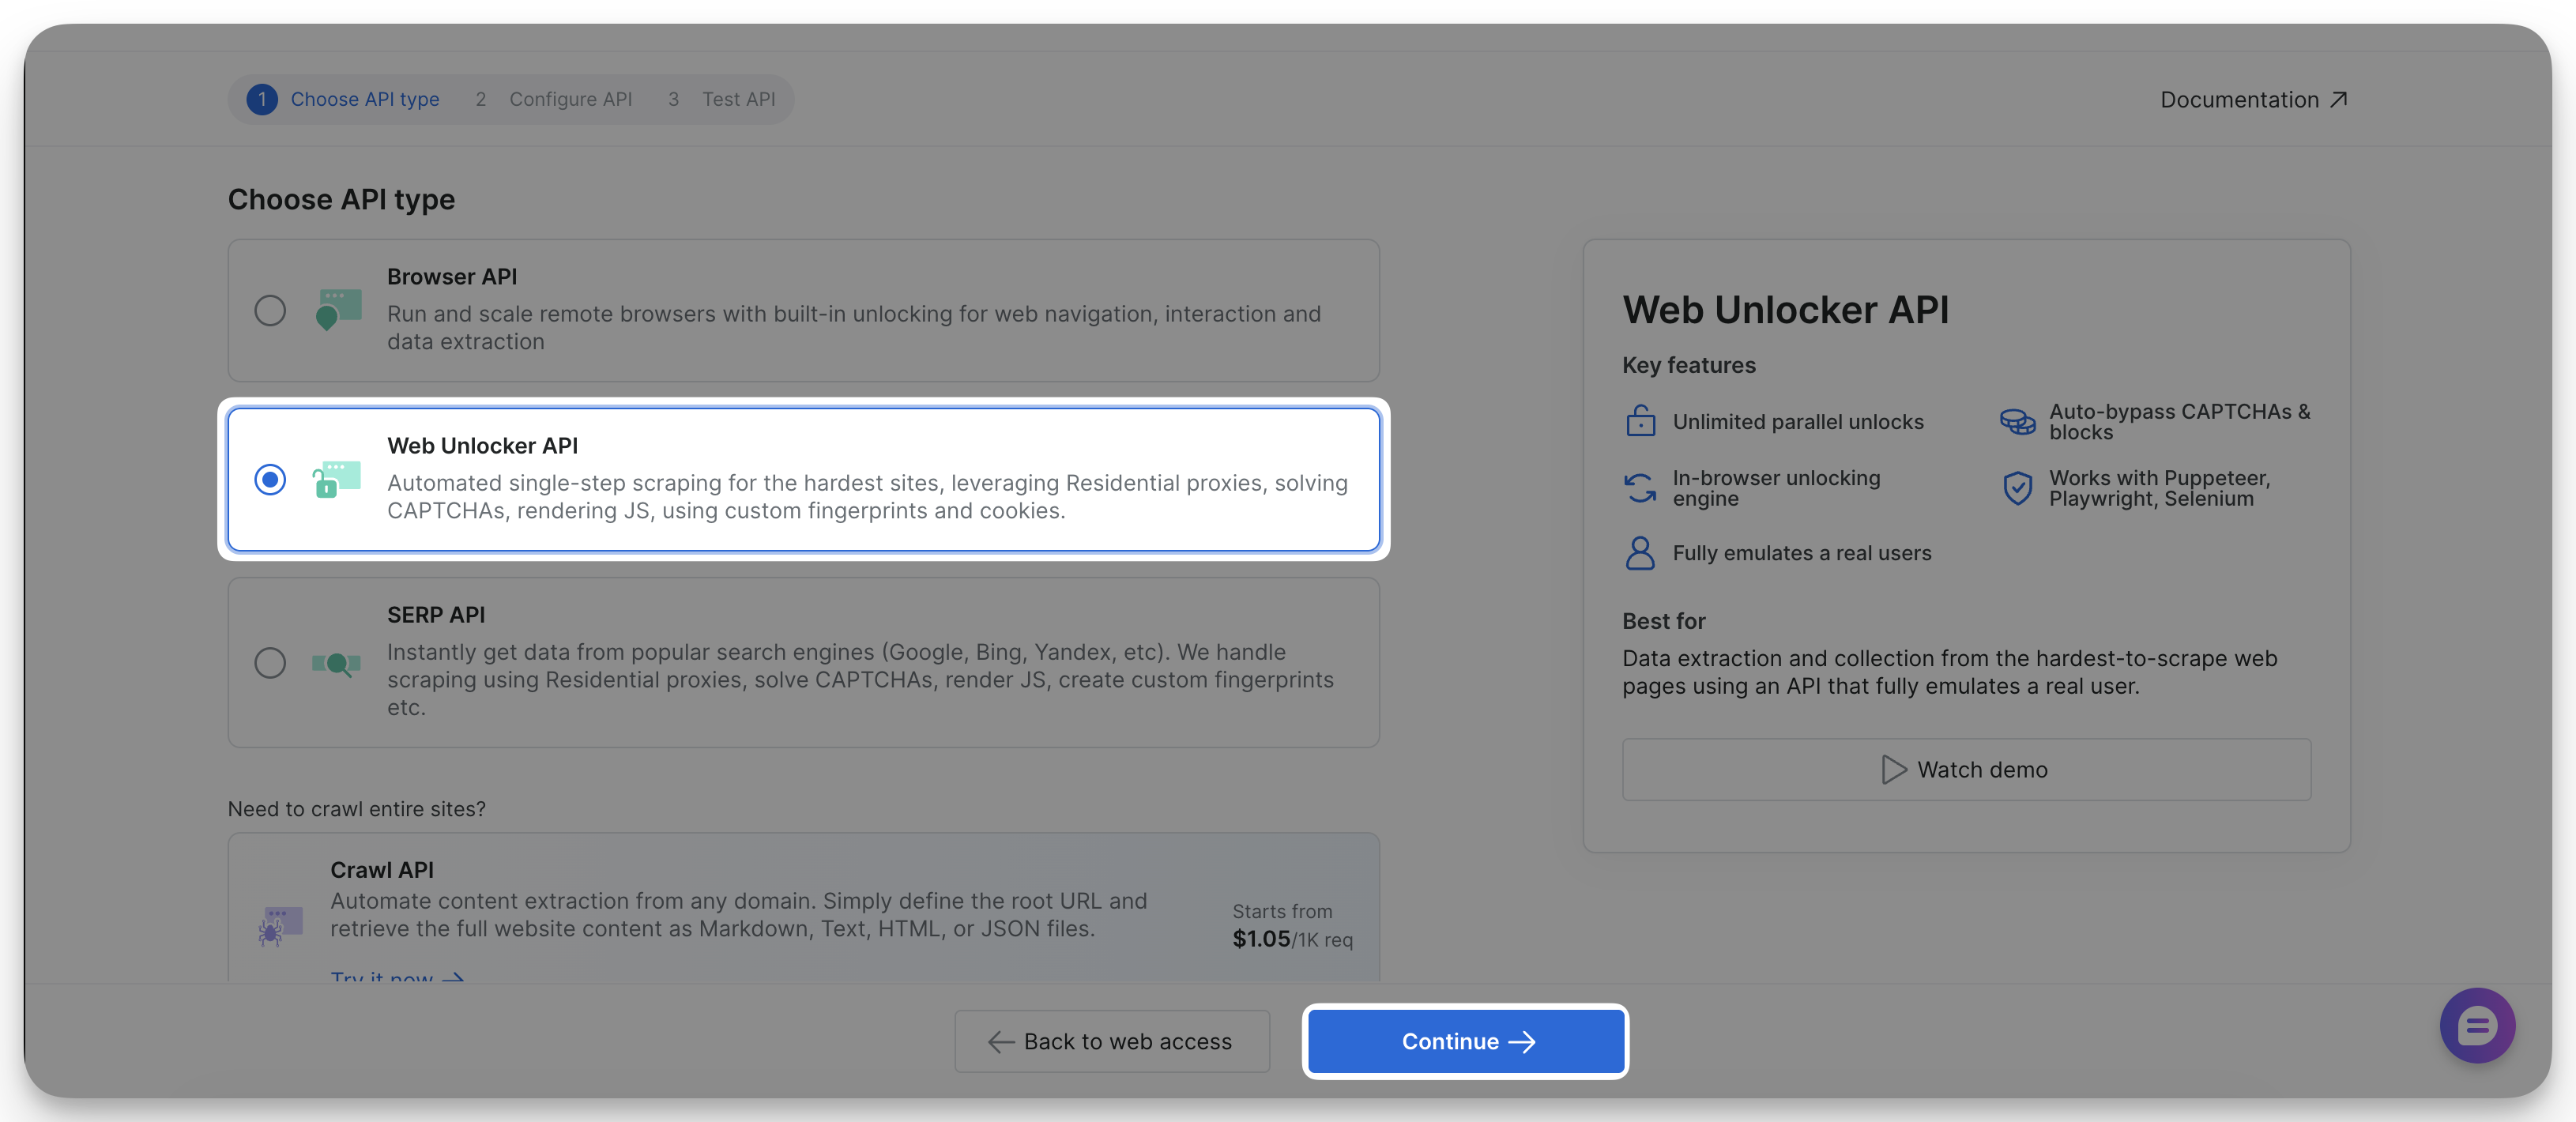
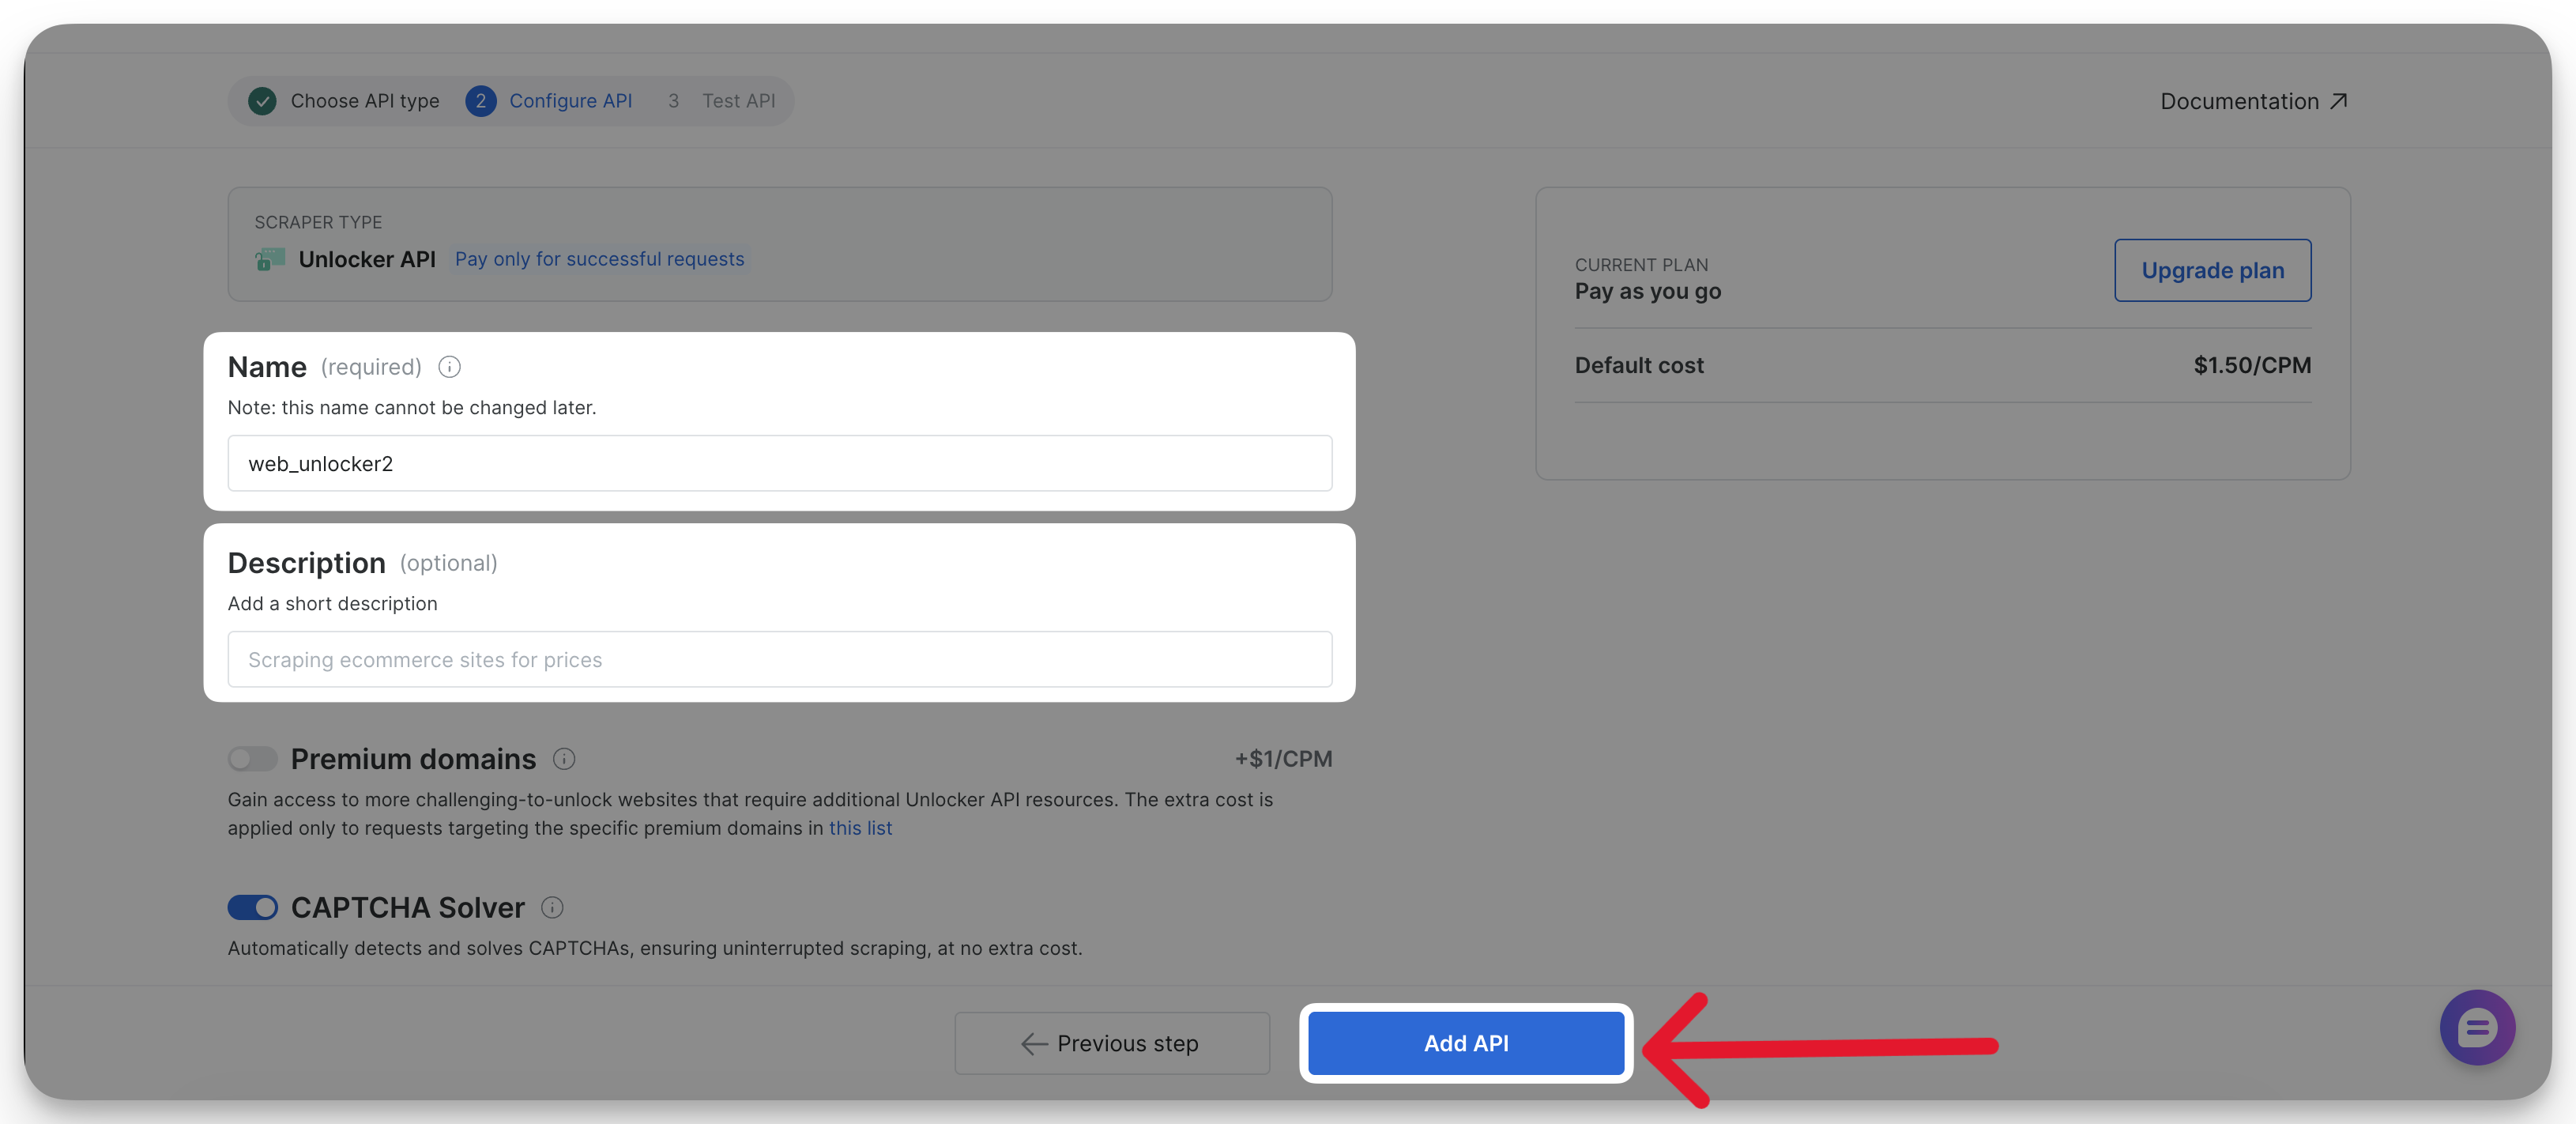
Assign a name to your Unlocker API
Enter a clear and descriptive name for your Unlocker API. This helps you identify the API later, especially if you manage multiple zones.You may also add an optional description for internal reference.